Recent activity on NFSAddons

Need for Speed The Need For Speed II Downloads
Unofficial CarEditor v0.55

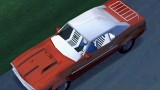
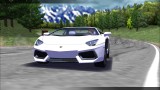
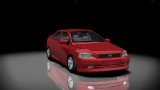
Additional Screenshots
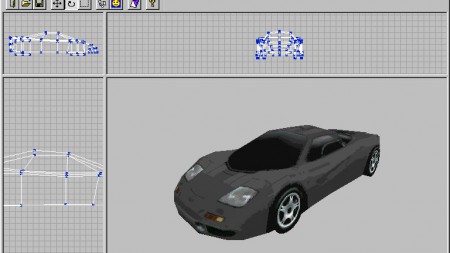
Description
A NFS2 car editor, needed for installing NFS2 cars.
HOW TO USE:
Main CarEditor controls
To open NFS2 Car select "File->NFS2 Open".
To open NFS2 SE Car select "File->NFS2 SE Open".
To open NFS1 Car select "File->NFS2 Open", choose "Files of type" "*.CFM".
To save NFS2 Car select "File->NFS2 Save" or "File->NFS2 Save As" to save another filename.
To save NFS2 SE Car select "File->NFS2 SE Save".
To edit texture of the car start Texture Editor: choose "Included Editors->Texture Editor" or press "Shift+T".
To start Car Part Selector choose "View->CarPartSelector" or press "Shift+C".
To change Windows Settings you have to start Windows Propertie Editor as followed: select "Settings->Edit ViewWindow Properties" or press "Shift+S".
To change size of the windows move the mouse on the horizontal/vertical line or on the the cross of them, hold left mouse button down and move the mouse.
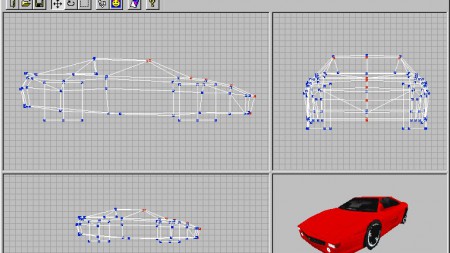
Model Editor
To move camera in a window choose "Editing Modes->Translate Mode" or press "Shift+1", hold left/right mouse button down and move the mouse.
To rotate camera in a window choose "Editing Modes->Rotate Mode" or press "Shift+2", hold down left/right mouse button down and move the mouse.
To select vertices of the carmodel, choose "Editing Mode->Select Mode" or press "Shift+R", hold left mouse button down, move the mouse, release left mouse button.
To deselect vertices of the carmodel, choose "Editing Mode->Select Mode" or press "Shift+R", by holding the "Shift" key down do folowing: hold left mouse button, move the mouse, release left mouse button.
To move selected vertices press right mouse button and move the mouse in the Select Mode.
Texture Editor
To choose a texture select one of the strings in the ListBox by clicking on it with the left mouse button.
To choose a color click with the left mouse button on the palette area.
To change a color in the palette double click with the left mouse button on this color, define custom color and press "Ok".
To draw a texture hold left mouse button down in the texture area down and move the mouse.
To change the size of the brush use "Pen Size" SpinControl.
To select the color of a pixel in the texture click with the right mouse button on this pixel in the texture area.
To Save editod texture press "Save" button!
To Restore original texture press "Restore".
To export current texture to a bitmap file press "Export Image" button, select a file name and press "Save".
To import a bitmap file to current texture press "Import Image" button, select a file and press "Open".
To Export full cartexture press "Export Full Car Texture" button, choose a file name and press "Save".
To Import full cartexture from a file press "Import Full Car Texture" button, choose a file and press "Open".
To Change Full Car Texutre File open in a Graphic Program bitmap file (BMP) with the same name of the CarEditorTexture file.
Press "Return to Editor" to return to Model Editor.
Car Part Selector
To select parts, select some parts in the left ListBox and press ">" button.
To deselect parts, select some parts in the right ListBox and press "<" button.
Window Properties Editor
To choose a view, which properties you want edit click on the tabs (top of the window). First tab is top-left window, second tab is top-right window, the third tab is bottom-left window, the fourth tap is bottom-right window.
Defined User Views: camera position to the car (top, left, front view...).
Camera Angle: the angle of the camera (can be changed with the Rotate Mode, if "Fixed" is not selected).
Camera Position: position of the camera (can be changed with Translate Mode).
Render Mode: how to render carmodel (wireframed, flat or with texture). Perspective means perspective rendering mode on/off.
Grid Frequence: frequence of the grid.
Note: Window size can't be change in this Dialog.
Press "Ok" button to save changes or "Cancel" to draw them.
| 2. How to start editing CarMesh |
Open a car you want to edit.
With Window Properties Editor choose the best camera position, angle, etc. for each View.
For example:
top-left view: top view, redering mode - wireframed, perspective off;
top-right view: left view, redering mode - wireframed, perspective off;
bottom-left view: front view, redering mode - wireframed, perspective off;
bottom-right view: user view, redering mode - textured, perspective on;
Choose Select Mode and draw a rectangle in top-left window. All points which are inside this rectangle were selected. By holding down right mouse button and moving the mouse you can move selected points to left/right or up/down.
When you finished with reposition of these points, press "Shift" key down and draw rectangle around them. By releasing of left mouse button all points, which are inside this recangle, will be deselected.
Note: you can move, select or deselect points in any view window at any time! By changing of editing mode the selection of points will not get lost. This give you ability to rotate the camera while reposition the points, so you can see how got the car edited.
| 3. How to start editing CarTexture: |
Open a car and run TexureEditor.
Select one of the TextureBitmaps in the ListBox.
Select a color in the Palette Section (left from listbox) and choose pen size.
Now you can edit TextureBitmap by pressed the left mouse button in the Texture Section (left from palette section). Hold left mouse button down and move the mouse to make smooth curves.
To get color of a point click on it with right mouse button.
If you made a mistake, just press "Restore" button to restore the original Texture.
When you finished with editing DON'T forget to press "Save" button or your work will get lost!
You can also change the palette by pressing with right mouse button on the color you want to change. This is usefull when you haven't colors you need.
Note: All texture bitmaps of a car use the same palette!
If you like to draw in your own graphic program (i.e. PainShopPro) you can export one or all texture bitmaps.
If yu have exported only one texture bitmap you will get a BMP file with you can redraw, resize etc.
Note: Don't forget to optimize image palette to 256 color mode!
If you have exported full car texture, you won't be able to change the size of each texture bitmap, but you can edit all texture bitmaps at the same time. Files the editor creates by exporting full car texture are "name".ced and "name".bmp.
Random NFS Addon
Latest Addons
- Autocross
- Lewis Hamilton
- VF Traffic Pack 1.1
- 2012 Peugeot Onyx (Modloader/Addon)
- 2020 Audi RS3 Sedan (Modloader/Addon)
- 2016 Toyota TS050 Hybrid (Modloader/Addon)
- 2023 Ferrari Daytona SP3 (Modloader/Addon)
- Updated: 2001 B Engineering Edonis
- Updated: 2004 RUF R50
- Updated: 2007 Melling Hellcat Prototype
Visitor Comments
Error: You must be logged in to comment on this file.
Not registered yet? Register here. It only takes 30 seconds.
Forget your password? Find it here.